![]()
I used to receive an emails about How to: Apple Mail.app plugin development? then responded with enough details to begin their journey. Then I thought create an article around Apple Mail.app plugin development for community.
I believe this article would provide guidance for your plugin development. Have queries use Disqus thread at the end of article.
If I get an enough time, will do article for –
- Custom menu & menu commands into the Mail.app
- Utilizing Mail.app preferences file, so migration/upgrade is easy for users
- Custom preferences panel & preferences file
- Custom window
Steps to create a Mail.app plugin
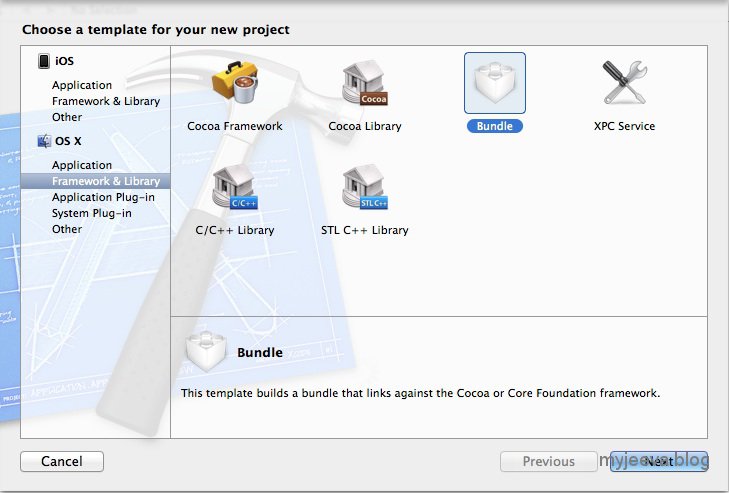
Step 1
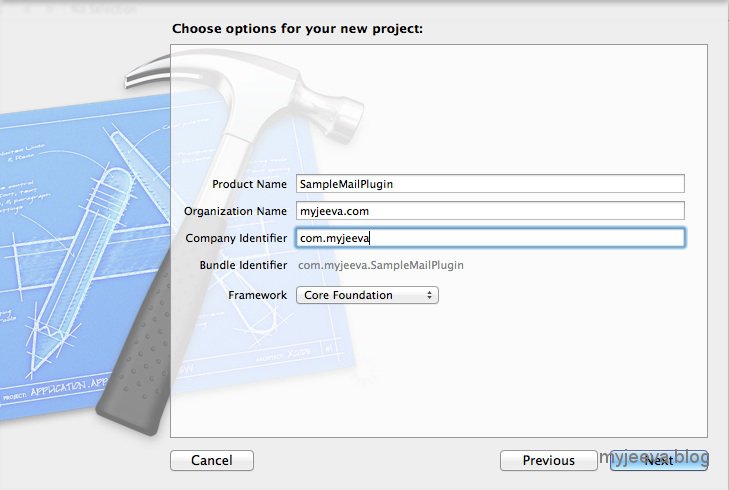
Create a Xcode project type ‘Bundle‘ and Click ‘Next‘
- Enter Product Name
- For example: SampleMailPlugin
- Enter Company Identifier
- For example: com.myjeeva
- Click Next
- Save dialog appears, save SampleMailPlugin Xcode project to hard drive
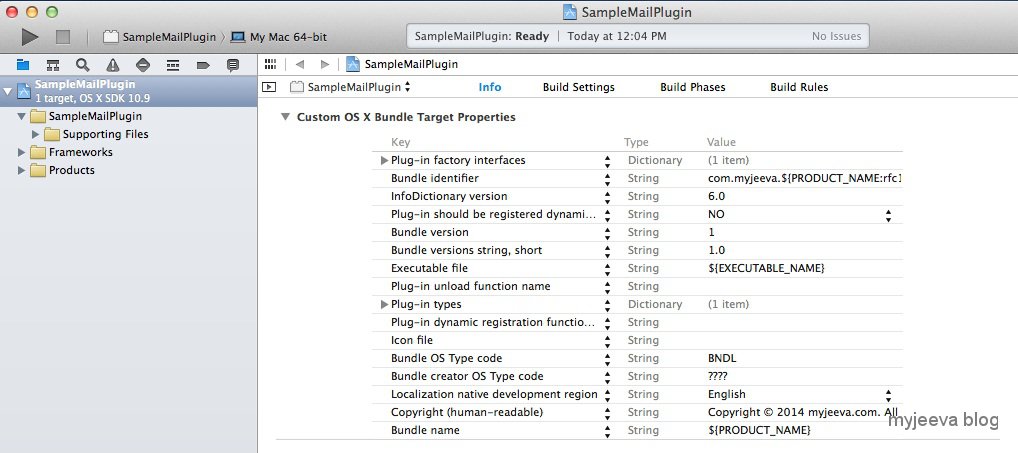
Step 2
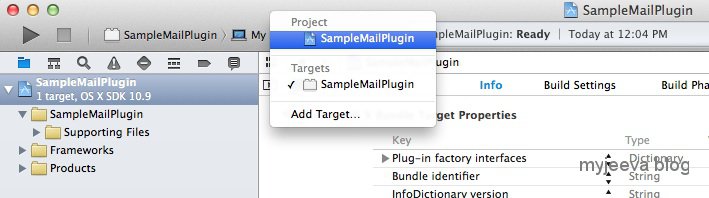
Select a Project in the navigator, target is selected by default
- Fill up following Key value as per need (All the values here goes to Info.plist)
- Bundle name
- Bundle identifier
- Bundle version
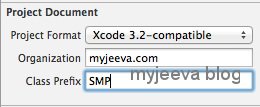
- Enter Class Prefix under ‘Project Document‘ Section
- For example: SMP
Step 3
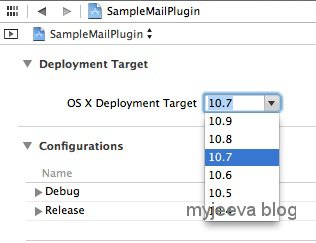
Select a Project
- Go to ‘Info‘ Tab and pick OS X Deployment Target
- Go to Build Settings Tab
- Select ‘Base SDK‘ per choice
- set ‘Debug Information format‘ value to DWARF
- set ‘Installation Directory‘ value to $(HOME)/Library/Mail/Bundles
- set ‘Info.plist‘ value to SampleMailPlugin-Info.plist
- set ‘ProductName‘ value to SampleMailPlugin

Step 4
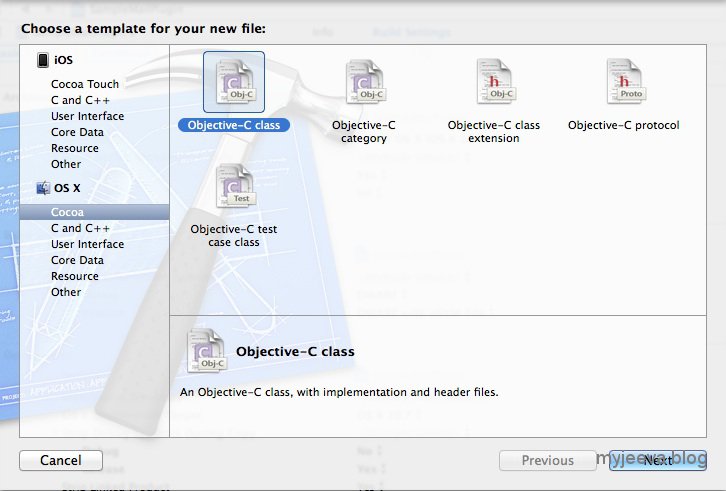
Select ‘SampleMailPlugin‘ group on Project Navigator
- Create a Objective-C class
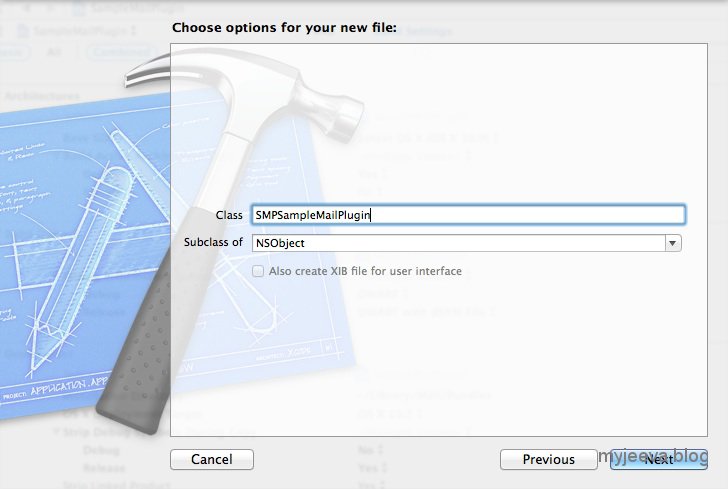
- For example: create SampleMailPlugin class, prefix is pre-populated
- Now SMPSampleMailPlugin.h & SMPSampleMailPlugin.m gets created

Step 5
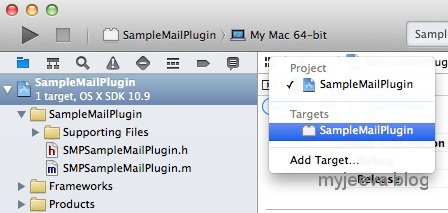
Select project root ‘SampleMailPlugin‘ on the Project Navigator
- Select ‘SampleMailPlugin‘ target from popup menu
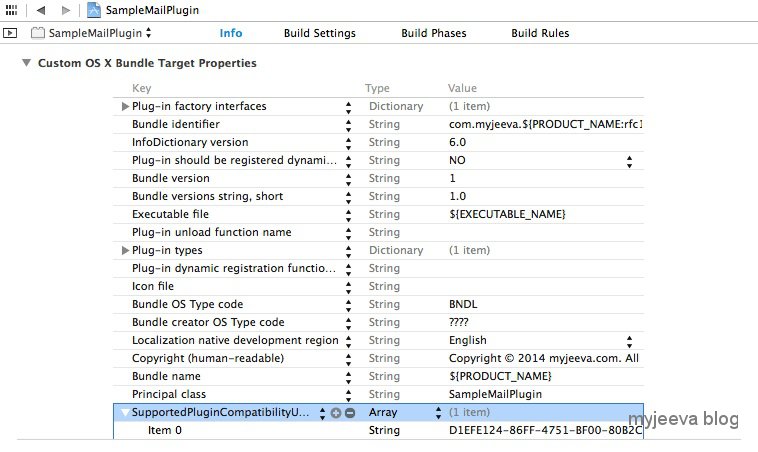
- Go to Info Tab (All the values here goes to Info.plist)
- Add a Key Principle class and choose type as String enter value as ‘SMPSampleMailPlugin‘. This is entrypoint for mailbundle
- Add a Key SupportedPluginCompatibilityUUIDs and choose type as Array
- Fill Mail.app UUID (mail version is 7.3) – D1EFE124-86FF-4751-BF00-80B2C0D6F2E4
- Get your Mail.app UUID, use for development; this command might help you defaults read /Applications/Mail.app/Contents/Info PluginCompatibilityUUID
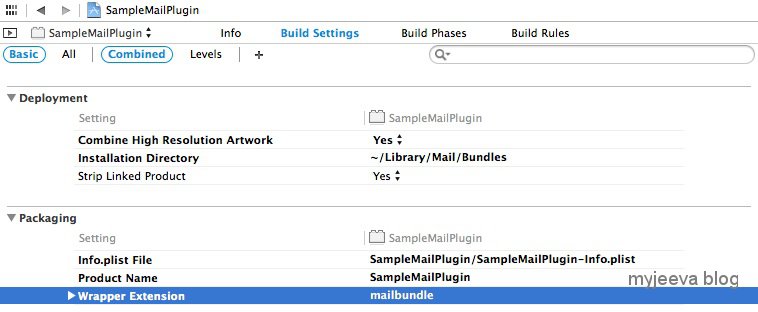
- Go to ‘Build Settings‘ Tab
- set ‘Installation Directory‘ value to $(HOME)/Library/Mail/Bundles
- set ‘Wrapper Extension‘ value to mailbundle
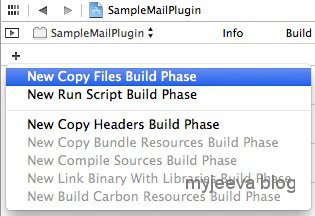
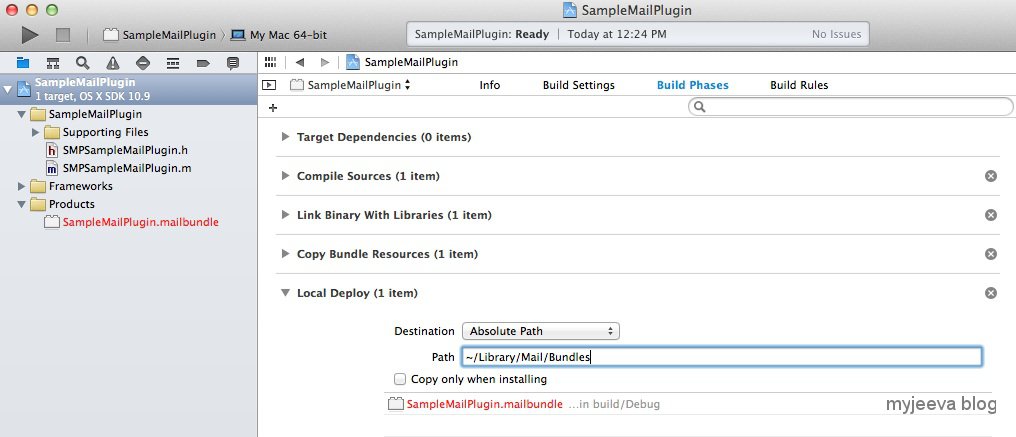
- Go to ‘Build Phases‘ Tab
- Add new ‘Build Phase‘ of type Copy Files
- Double click ‘Copy Files‘ label and Update the heading to Local Deploy
- Select ‘Destination‘ value as Absolute Path
- set ‘Path‘ value to ~/Library/Mail/Bundles. It deploys the current build into mentioned local path
- Click on ‘Plus‘ sign button then choose SampleMailPlugin.mailbundle or just drag a SampleMailPlugin.mailbundle form Project Navigator to here

Step 6
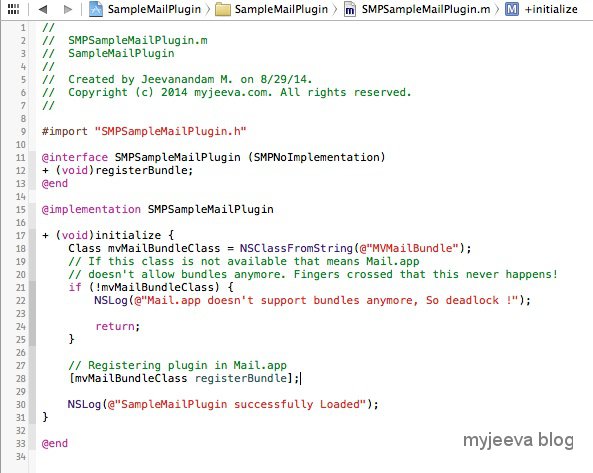
Select SMPSampleMailPlugin.m file on the Project Navigator
- Create a class method called + (void)initialize { …. }
- Add following Code Snippet into method initialize
Class mvMailBundleClass = NSClassFromString(@"MVMailBundle");

// If this class is not available that means Mail.app
// doesn't allow bundles anymore. Fingers crossed that this never happens!
if (!mvMailBundleClass) {
	NSLog(@"Mail.app doesn't support bundles anymore, So deadlock !");
	return;
}

// Registering plugin in Mail.app
[mvMailBundleClass registerBundle];

NSLog(@"SampleMailPlugin successfully Loaded");
- Add following interface definition into SMPSampleMailPlugin.m
@interface SMPSampleMailPlugin (SMPNoImplementation)

+ (void)registerBundle;

@end
Step 7
Let’s build the plugin and test. Press Command + B or go to Product menu click Build.
Step 8
Look at our new build mail plugin and Console.app
- Open up Finder hold Command + Shift key and press G
- Type ~/Library/Mail/Bundles hit the ‘Go‘ button, now SampleMailPlugin.mailbundle should be there
- Open up Console.app
- Type ‘Mail‘ in right upper Search text box in Console.app to limit message to Mail.app

Step 9
Final goal, open up Mail.app. Now you should similar message in console.app
8/29/14 1:27:05.656 PM Mail[42713]: SampleMailPlugin successfully Loaded
Step 10 (Optional)
If you’re using or developing Mail.app plugin for a first time; Plugin support may not be enabled in Mail.app, so execute below command in the Terminal.app. Restart the Mail.app
$ defaults write com.apple.mail EnableBundles -bool true
Download
If you have any queries, please leave a comment below!
SampleMailPlugin Archive